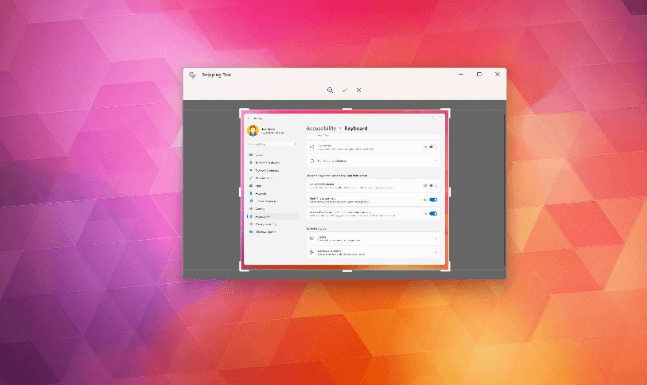
The Snipping Tool is a built-in screenshot utility included with Windows operating systems. It allows users to capture various types of screenshots with ease, making it an essential tool for many Windows users. This article will delve into what the Snipping Tool for windows is, its features, how to use it, and some tips and tricks to get the most out of this handy utility.
What is the Snipping Tool?
The Snipping Tool is a lightweight, user-friendly application that comes pre-installed on Windows computers. It provides a simple interface for taking screenshots, also known as “snips,” which can be saved, annotated, and shared. The Snipping Tool has been part of the Windows operating system since Windows Vista, and it has undergone various updates and improvements over the years.
Features of the Snipping Tool
The Snipping Tool offers a variety of features that make it a versatile utility for capturing screenshots. Here are some of its key features:
Multiple Snip Modes
The Snipping Tool provides four different snip modes:
- Free-form Snip: Allows you to draw a freehand shape around the area you want to capture.
- Rectangular Snip: Lets you drag the cursor around an object to form a rectangle.
- Window Snip: Captures a specific window that you select.
- Full-screen Snip: Takes a screenshot of the entire screen.
Annotation Tools
After capturing a snip, the Snipping Tool offers basic annotation tools to enhance your screenshot. You can use a pen, highlighter, and eraser to mark up the image.
Delay Feature
The delay feature allows you to set a timer before a screenshot is taken. This can be useful if you need to capture menus or tooltips that require some interaction before they appear.
Save and Share Options
Once you have captured and annotated your snip, the Snipping Tool provides options to save the image in various formats (such as PNG, JPEG, GIF, or HTML), copy it to the clipboard, or email it directly from the application.
How to Use the Snipping Tool
Using the Snipping Tool is straightforward. Here’s a step-by-step guide on how to capture, annotate, and save screenshots using the Snipping Tool.
Opening the Snipping Tool
To open the Snipping Tool, follow these steps:
- Windows 10 and earlier:
- Press the Start button.
- Type Snipping Tool in the search box.
- Select the Snipping Tool from the list of results.
- Windows 11:
- Press the Windows key + Shift + S. This opens the Snip & Sketch tool, which is the updated version of the Snipping Tool in Windows 11.
Capturing a Screenshot
Once the Snipping Tool is open, you can capture a screenshot by following these steps:
- Select a Snip Mode:
- Click on the Mode button and choose the desired snip mode (Free-form, Rectangular, Window, or Full-screen).
- Set a Delay (Optional):
- Click on the Delay button and choose the number of seconds you want to wait before the screenshot is taken. This is optional and can be useful for capturing context menus or tooltips.
- Take the Snip:
- Click New to start the screenshot process. Depending on the snip mode you selected, you will either draw around the area you want to capture, select a window, or the full screen will be captured.
Annotating the Screenshot
After taking a snip, the screenshot will open in a new window where you can annotate it using the following tools:
- Pen: Draw freehand lines on the screenshot.
- Highlighter: Highlight areas of the screenshot.
- Eraser: Remove annotations made with the pen or highlighter.
Saving and Sharing the Screenshot
Once you have captured and annotated your screenshot, you can save or share it:
- Save the Screenshot:
- Click the Save As button.
- Choose the location where you want to save the file.
- Select the file format (PNG, JPEG, GIF, or HTML) and click Save.
- Copy to Clipboard:
- Click the Copy button to copy the screenshot to your clipboard for pasting into other applications.
- Email the Screenshot:
- Click the Send Snip button to email the screenshot directly from the Snipping Tool.
Tips and Tricks for Using the Snipping Tool
Here are some additional tips and tricks to help you get the most out of the Snipping Tool:
Keyboard Shortcuts
- Windows Key + Shift + S: Quickly open the Snip & Sketch tool in Windows 10 and 11.
- Alt + N: Start a new snip.
- Alt + M: Choose a snip mode.
- Ctrl + S: Save the snip.
- Ctrl + C: Copy the snip to the clipboard.
Combining Snipping Tool with Other Tools
You can enhance the functionality of the Snipping Tool by combining it with other tools:
- Microsoft Paint: After capturing a snip, you can paste it into Microsoft Paint for more advanced editing.
- OneNote: Paste your snip into OneNote to organize your screenshots and notes in one place.
Using Snip & Sketch in Windows 10 and 11
Snip & Sketch is the modern version of the Snipping Tool in Windows 10 and 11, offering additional features like:
- Integrated Annotation Tools: More advanced tools for annotating screenshots.
- Direct Sharing: Options to share screenshots directly to apps like Mail, Twitter, and more.
- Touch Support: Enhanced support for touchscreens and stylus input.
Conclusion
The Snipping Tool is an invaluable utility for Windows users, providing a simple yet powerful way to capture, annotate, and share screenshots. Whether you are using it for work, school, or personal projects, the Snipping Tool can enhance your productivity and help you communicate more effectively. By understanding its features and learning how to use it efficiently, you can make the most out of this handy application.


